
10 Steps to Becoming a Papercutter
 |
| @JessCutitout |
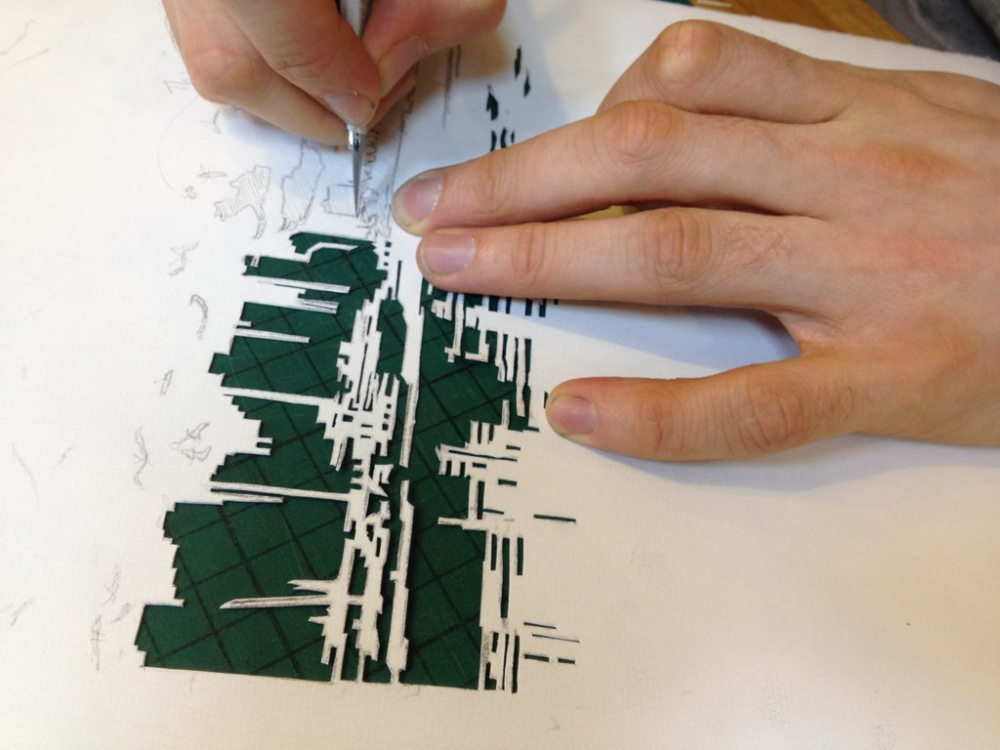
Before you begin any papercut piece, you need to start to see the image with the eyes of a papercutter. This is the bit that provides great exercise for the brain. It is often the moment in my workshops when people look a bit dazed and confused – but stay with me for a moment. It is simpler than you think. You need to break any image down into positive and negative areas and shapes. If you are working with black paper, which you will mount on a white background, the black is the positive and the white is the negative. The negative is the part you cut away. The positive is the part you leave behind which becomes your papercut drawing.

I think papercutting is more similar to carving stone or wood than applying paint because the process is one of whittling away until you achieve the image you want. What makes this tricky is that our eyes see many gradations of colour and tone, so to convert a drawing, painting or photograph into a papercut means not just simplifying it into two tones but redesigning the image so that it sits comfortably in two dimensions.
I begin any papercut with a pencil drawing. Here I start to map out areas that are positive and negative. I draw in as much detail as I can in advance, in the sure knowledge that this will change and evolve in the final papercut.
At this stage, I think about pattern within the papercut. This pattern is my light and dark, texture and contour, tone and decoration. I look for ideas about pattern in everything around me from lace to armour, from insects to trees. This is really an extension of the idea of breaking an image down into positive and negative areas. The next stage is to think about the shapes you will cut out. These may be geometric or organic. They may be repeated or scattered unevenly.
I tend to think in terms of either a formal or informal pattern. The most successful papercuts are achieved where areas of pattern are balanced with solid areas left uncut.
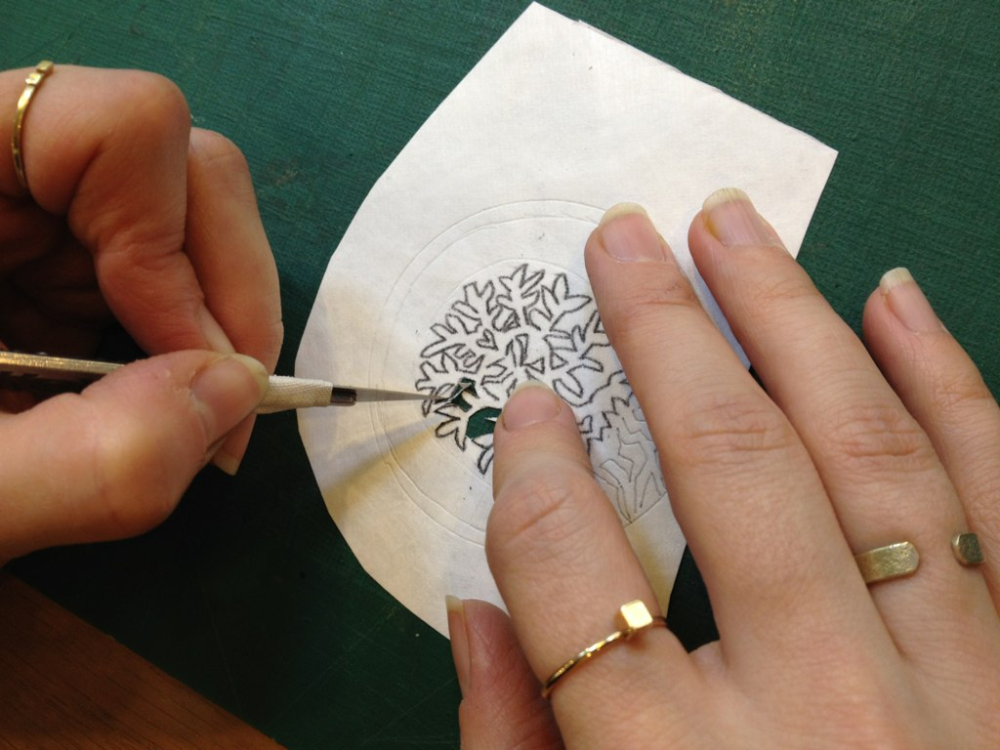
1 Most of the time you will be cutting – or drawing as I think of it – with the tip of the knife, as you would with a sharp pencil. Make sure the knife sits comfortably in your hand. Hold it the way you would a pencil or a pen. Wrap masking tape tape around the part of the scalpel handle where it joins the blade to protect your fingers and give you a better grip.
2 Always use a self-healing cutting mat. It is important that the tip of the knife meets the surface of the mat as you cut. This is essential for your control of the knife blade and for safety. The mat will prevent your knife from slipping and the cuts you make in the mat will seal up, leaving a smooth surface on which to make further cuts.
3 Hold the knife firmly but without excessive pressure, keeping it at roughly a 45-degree angle to the paper. Use the forefinger of your opposite hand to guide the tip of the knife and to keep the paper from slipping or stretching. Keep your other fingers tucked in to protect them. Always cut towards yourself, as this will give you more control over the line you are cutting.
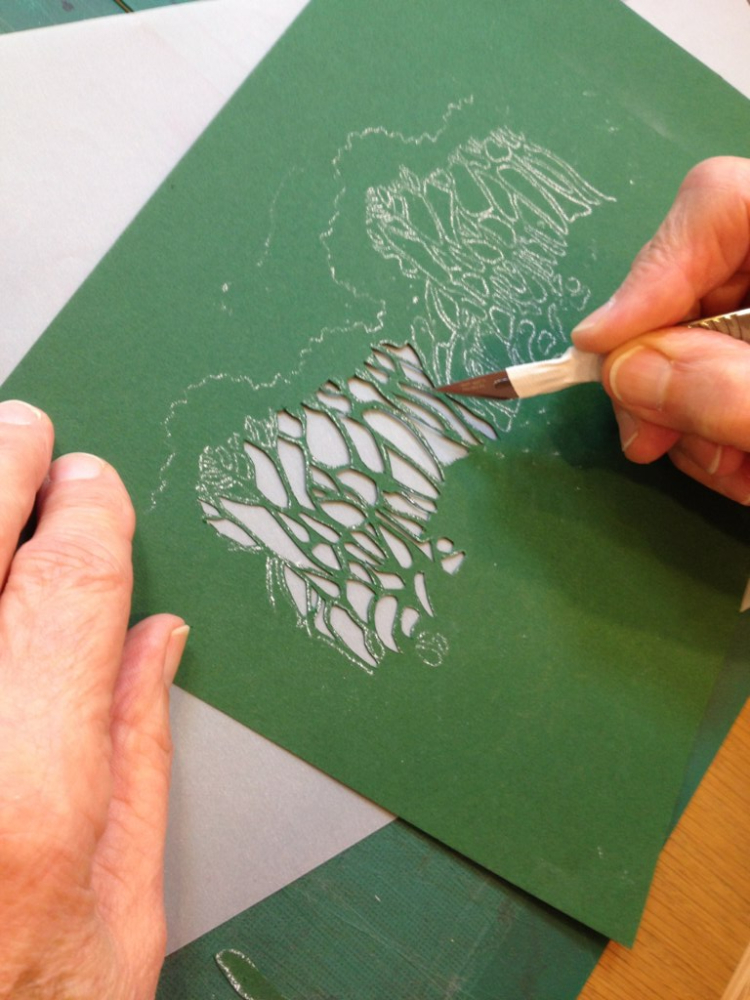
4 With your reference material close at hand, begin cutting from the centre of the image and work outwards gradually, turning the paper as necessary. Take small pieces at a time. Lift out the bits of paper you are removing with the tip of the scalpel blade.
5 Use the straight edge of the scalpel blade to cut straight lines, holding the scalpel at a slightly lower angle to the paper.
6 Use the tip of the blade to cut sharp angles, digging the tip firmly into the mat and moving the paper to cut the opposite angle.
7 Cutting a circle is achieved by making a series of very short, straight cuts, moving the paper around and keeping the knife inserted into the paper. You might cut a circle of the size shown in eight to ten cuts.
8 Make the first cut. Turn the paper and make the next cut.
9 Turn again and cut. Continue until the circle is complete.
10 Lift out the circle with the tip of your blade.


******************************************
 Jessica Palmer became an illustrator after a career as a BBC producer, and specialises in paper art – paper cuts, collages and 3D paper sculptures. Her work is commissioned for public installations, advertising and marketing, design and decoration, books, websites and magazines, as well as for bespoke gifts. Currently she's drawing a 90 page book of images inspired by the Tiffany Glass designs of Clara Driscoll.
www.jessicapalmerart.com
Twitter: @JessCutitout
email Jessica here


Thanks for the inspirational tips, Jessica - especially the circle cutting one! Very useful :)
ReplyDelete