
ILLUSTRATION KNOWHOW Scanning your artwork
Whether it’s for reproduction or sending to publishers, most illustrators eventually face the need to convert their artwork into digital format. If you only work with traditional media and feel a bit lost, Illustration Editor, Tita Berredo, offers a few beginner steps that will help you digitise your work with quality.
First, you must know that there are many different scanners around for different purposes. You can achieve high quality images with a basic flatbed photo scanner without having to spend a lot of money. Second, is that most illustrators work on iMac and that is the layout you will see here, but all the basic settings will also work for Windows.
Open your scanner on your system preferences and you will see the settings along with a scan overview. There are many options that you can play with when you get some confidence, but for now you only have to focus on the main ones.
In Kind, choose Colour for coloured illustrations and Black & White if you want to scan in greyscale. Since you can adjust colour and contrast later on software, choosing colour is fine for all kinds.
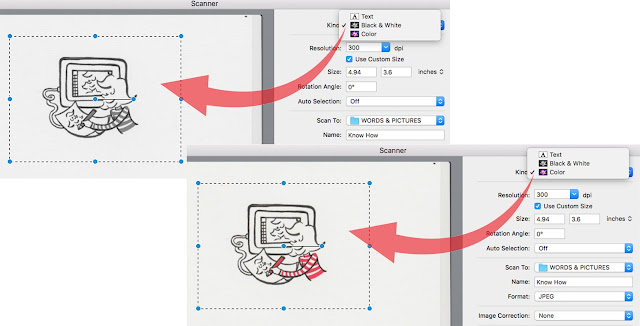
In Resolution you will have different choices. The minimum amount to avoid pixelation is 300dpi (dots per inch). This amount will work just fine for simple outlines like the one shown, but you might want to choose a higher resolution for more detailed work. Use between 400dpi and 600dpi for intricate illustrations with different textures and colour.
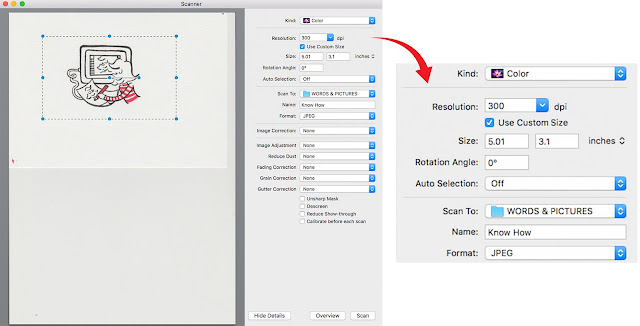
In Size you can choose to crop the scanned area to match your actual illustration instead of scanning the whole paper. This will reduce the weight of your file. You can also rotate manually or automatically.
Scan To a folder of your choice and Name your file. The Format will depend on what you plan to do with the file after scanning. You can save as jpeg, tiff, or png to work on most softwares like Photoshop and Adobe Illustrator. If in doubt, use jpeg.
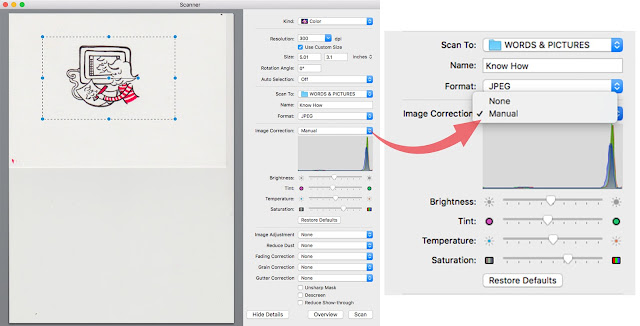
You might notice that some of your scanned images don't look as vivid as they do in reality.
The process of scanning throws a bright light in order to capture the image and this might result in washed out colours. You can use the manual image correction to improve the brightness and saturation. This can also be done later in any image editing software.
Next time we’ll take a closer look at correcting your images on Photoshop!
All images © Tita Berredo

Tita Berredo is Illustration Features Editor for Words & Pictures. She has a Master's degree in Children's Literature and Illustration from Goldsmiths UOL, and a background in social communications, marketing and publicity. www.titaberredo.com


No comments:
We love comments and really appreciate the time it takes to leave one.
Interesting and pithy reactions to a post are brilliant but we also LOVE it when people just say they've read and enjoyed.
We've made it easy to comment by losing the 'are you human?' test, which means we get a lot of spam. Fortunately, Blogger recognises these, so most, if not all, anonymous comments are deleted without reading.